
When we moved into our new house we soon discovered there was nowhere to hang our clothes. So, we decided to buy a fold-down clothesline: the problem was, I had to figure out how to install it.
We visited Bunnings and asked what it would cost to have someone install our fold-down clothesline for us and we didn’t like the price that was quoted back to us (a whopping $160).
I figured ‘hey, I can install a clothesline for less than $160’, so I chatted to one of the handy shop assistants and he gave me all the advice necessary on how to complete the task.
I explained we wanted to mount the clothes line in the ground, as opposed to on a wall or fence, so he detailed everything I’d need to make that happen.
You’ll be glad to know the total cost was far less than $160.
What you’ll need to get started
- 2 x 20kg bags of quick-dry cement
- 1 x shovel
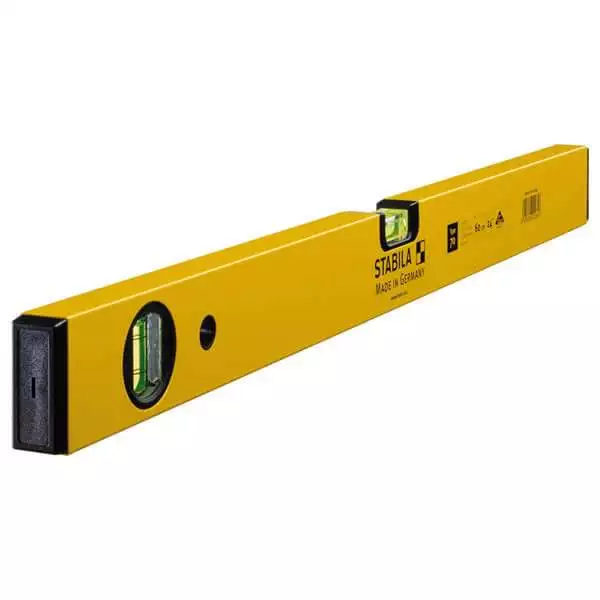
- 1 x spirit level
- 1 x hand trowel
- 1 x bucket
- Water
- 1 x tape measure
- 2 x steel uprights
- And, of course, one fold-down clothesline (but I haven’t included this in the cost)

First step: Measure, mark and dig your holes
Unpack your fold-down clothesline and, using your tape measure, measure the width from the centre of each bracket (where you will mount the frame to the uprights later on).
Once you’ve got your number – let’s say, for example, the width is 1500mm – mark out two holes at the location where you intend to install the clothesline.
The first hole should be marked at 0mm, and the other at 1500mm.
After you’ve completed this task, grab one of your uprights and measure its height – again, for example’s sake, let’s say the height is 1200mm.
Once you’ve done this, grab your shovel and get digging.
The Bunnings shop assistant recommended digging a hole that is a third of the depth of the height of the upright, and everything I’ve read online backs this up.
So, for uprights that are 1200mm in height, you’ll need to dig a 400mm hole.
Second step: Prepare the cement
For the next part, you’ll probably need help from another person.
I did everything myself up until this point, but when it comes to setting up the uprights – particularly ensuring everything is square and level – you’re best to get some assistance.
Grab your two bags of cement, and using a knife or your bare hands, open them up (but don’t let them spill everywhere).
On the bags, it should detail the water-cement ratio you’ll require to get the perfect mix. For a 20kg back, I used around 5L of water – we’ll use that as the example in this scenario.
Grab your bucket – ideally, you’ve bought one with measuring markers on it – and fill it up to 7L.
The reason for the extra 2L is because you need to ‘prime’ the holes before filling them with cement.
What this means is you’ll need to pour some water in first, and let the ground soak it in.
Having it wet before pouring in the cement will prevent it from cracking later on, after it has set.
Once the holes have been primed, make sure you have your spirit level nearby and place one upright into each hole.
Then, pour the remaining water into the hole and add one bag of cement afterwards (IN THIS ORDER).
Do the same for the other hole. Get your partner to hold one upright steady, while you hold the other one.
Step three: Make sure everything is level
The reason you’ve purchased quick-dry cement is exactly as it sounds – so that it will set in place as soon as possible.
This will typically start to happen in around 15 minutes, so up until then you’ve got a little bit of wriggle room to adjust the uprights.
Grabbing your spirit level, place it on top of the upright to ensure the bubble is in the centre of the level.
Do the same on all sides of the upright, for both uprights.
Once you’re happy everything is square, hold the uprights in place for the next 15 minutes until the cement has set.
It’s probably best to leave everything to set firm overnight before starting the next step of attaching the clothesline.
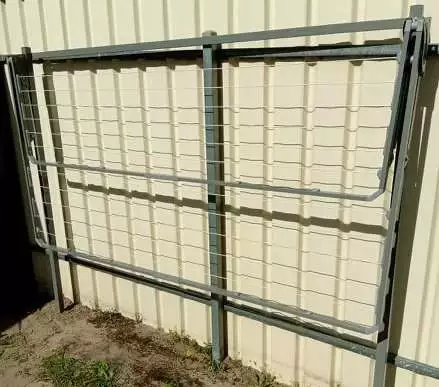
Step four: Construct the clothesline
Trust me, getting the uprights into the ground is the easy part – getting the clothesline out of the packaging and constructing it is by far the most difficult, tedious aspect of the whole job.
It took me a good few hours – and correcting a few installation errors – to finally get it put together.
I can’t stress how important it is to read the instructions with laser-like focus.
A lot of the instruction manuals will have pretty poorly illustrated steps to follow (this was certainly the case for me), so you really have to be patient and pay a lot of attention to detail.
I learnt this the hard way by having to wedge apart pieces of the clothesline after discovering I’d put them together incorrectly.
But, despite the frustration, once the frame comes together it is a rewarding experience, and you’ll feel like you’ve achieved a small victory.
One key error I made, which you shouldn’t repeat, is threading the line through the frame.
This is a BIG no-no. Doing this will warp the frame, due to the tension, causing it to operate incorrectly.
Wait until you’ve mounted the frame onto the uprights before threading through the line.
Step five: Mount the frame onto the uprights
Once you’ve constructed the frame, it’s time to attach it to the uprights. By now, the cement should have set enough to support the weight of the frame.
Important note: unless you’re a man mountain, or have four arms, you’re going to need someone to help you with this step.
The frame is heavy, and it would be almost impossible holding it up alone.
Truthfully, there really isn’t much to explain about this step, as bolting the frame to the uprights is pretty straight forward.
I’d recommend having all the nuts and bolts in your pocket so that you can place them into the necessary holes, without having to let go of the frame.
Step six: Thread the line through
Once you’ve successfully mounted the frame, the final step is to thread the line through.
When doing this, make sure you keep adequate tension on the line as you thread it through the holes.
You don’t want to let it relax, as the line will sag and won’t work as effectively as it should.
After this, you should be ready to celebrate your achievement, and hang your first load of washing!
How long does the whole process take?
From heading down to the hardware store and purchasing all the items, to threading the final line through, it took me almost a whole weekend to install our fold-down clothesline using in-ground uprights.
Obviously, a lot of this time was waiting for the cement to set, but all up, the actual amount of active work is at least a few hours.
This will be less if you decide to mount your clothesline to the wall, instead of attaching it to in-ground uprights.
Fold-down vs Hills Hoist: Which is better?
Honestly, it really comes down to personal preference.
The space we had to work with leant itself more towards using a fold-down clothesline, as it allowed us to pack it down and not take up heaps of room.
But, if you’re someone who has a bigger backyard and isn’t fazed by the hills hoist taking up a bit more room, then it is a perfectly good option.
They both come in different shapes and sizes, and your choice will be dictated by the space you have available.
Is it easier to pay someone to install your clothesline?
I did think about this after spending an entire weekend installing our fold-down clothesline.
While it may have been easier to pay a professional to do it, it certainly wouldn’t have been cheaper.
Besides, by outsourcing the work you don’t get the satisfaction of seeing the finished product, knowing that you did it all by yourself (with a little bit of help along the way, of course).
Where should I position my clothesline?
Definitely choose a location that has great access to the sun.
There’s no point mounting your clothesline in an area that is too well shaded, as it really defeats the purpose.
You need to have it out in the open, so that your clothes will dry as quickly as possible.
Our clothesline is set up so that it faces the northern sun, which is the ideal orientation for it.